Introduction to Chocolate Protein Bliss Balls
Finding a snack that is both delicious and nutritious can be quite the challenge. That’s where chocolate protein bliss balls come to the rescue! These little treats not only satisfy your sweet tooth with rich, chocolatey goodness, but they also pack a punch of protein to keep you feeling full and energized throughout the day. But why should you choose bliss balls as a snack instead of typical options like chips or cookies? Let’s dive in.
Why Choose Bliss Balls as a Snack?
Bliss balls are incredibly versatile and can be tailored to fit your dietary needs or preferences. Whether you’re looking for a post-workout pick-me-up or a mid-afternoon energy boost, these protein-rich gems are your answer. Here’s why they should have a permanent spot in your snack rotation:
-
Nutrient-Dense: Packed with ingredients like nuts, seeds, and protein powder, chocolate protein bliss balls offer a range of vitamins and minerals. For example, almonds are a great source of vitamin E and magnesium. According to the USDA, just a handful can boost your daily nutrient intake significantly.
-
Quick and Easy: Preparation is a breeze. With minimal cooking required, you can whip up a batch in under 30 minutes. Just mix, roll, and refrigerate! They make an excellent option for busy professionals looking for convenience without sacrificing health.
-
Customizable: Want to swap out flavors? No problem! You can add peanut butter for a nutty twist or even toss in some dried fruits for added sweetness. The possibilities are endless, and you can create a version that matches your taste perfectly.
-
Satisfying and Filling: Thanks to their protein content and healthy fats, these bliss balls are much more satiating than sugary snacks. You won’t find yourself reaching for another treat within the hour.
In addition, they store well, making it easy to prepare a large batch for the week ahead. Explore more about the benefits of protein-packed snacks from trusted sources like Healthline for additional insights.
So if you’re ready to indulge in something that’s not just tasty but also good for you, let’s get started on making these irresistible chocolate protein bliss balls. Your taste buds and body will thank you!
Ingredients for Chocolate Protein Bliss Balls
Creating your own chocolate protein bliss balls is not just satisfying; it’s a delicious way to fuel your busy lifestyle. Gather these ingredients for a delightful snack that packs a nutritional punch while satisfying your sweet tooth.
Essential Ingredients
- Protein Powder: Choose your favorite flavor, but chocolate is ideal for these bliss balls.
- Nut Butter: Almond or peanut butter works wonders, adding creaminess and healthy fats.
- Oats: Rolled oats provide texture and help bind the ingredients together.
- Medjool Dates: For that natural sweetness and gooey texture, dates are a must.
- Cocoa Powder: Unsweetened cocoa powder intensifies the chocolate flavor with minimal calories.
- Seeds or Nuts: Add chia seeds or chopped walnuts for an extra crunch and nutritional boost.
- Honey or Maple Syrup: Sweeten naturally with honey or maple syrup to enhance the blissful taste.
Making It Personal
Have fun experimenting with these ingredients! You can also check out sources like Healthline for more insights on the nutritional benefits of these components. And let’s be honest; who doesn’t love a snack that’s both tasty and easy to prepare? Ready to roll? Your chocolate protein bliss balls are just a few simple steps away!
Preparing Chocolate Protein Bliss Balls
Who doesn’t love a quick snack that’s both delicious and nutritious? Chocolate Protein Bliss Balls are not only a delightful treat but also a fantastic way to fuel your day. Whether you’re heading to the gym or need a pick-me-up during your workday, these little power-packed bites are a perfect choice. Let’s dive into how to make them!
Gather Your Ingredients
The first step towards making these scrumptious chocolate protein bliss balls is to have all your ingredients at hand. You’ll need:
- 1 cup of dates (pitted and soft)
- 1/2 cup of nuts (like almonds or walnuts)
- 1/2 cup of oats (rolled oats work best)
- 1/4 cup of cocoa powder (unsweetened)
- 1 scoop of protein powder (chocolate flavor is preferred)
- 1 tbsp of nut butter (like almond or peanut butter)
- A pinch of salt
Feel free to mix and match based on your preferences. For instance, you could swap the nuts for seeds or use a different flavor of protein powder. If you’re looking to explore superfoods, consider adding chia seeds or hemp hearts for an extra nutrient boost.
Mix the Wet Ingredients
Once you have your ingredients, it’s time to combine the wet ones. In a blender or food processor, add the pitted dates and nut butter. Blend until they form a sticky paste that holds together nicely. This is a crucial step since it will act as the binding element for your chocolate protein bliss balls.
You can add a touch of water or almond milk if the mixture appears too dry. I remember the first time I made these, I didn’t blend my wet ingredients enough, and they turned out crumbly. A well-blended paste ensures everything sticks together and enhances the overall texture of your bliss balls.
Combine the Dry Ingredients
In a separate bowl, mix your oats, nuts, cocoa powder, protein powder, and salt. You may be wondering why we separate the wet and dry ingredients. Mixing them separately ensures an even distribution of flavors and textures, which is key for perfect bliss balls.
Once combined, carefully fold in the wet mixture to the dry ingredients. Use a spatula or your hands (clean, of course!) to ensure everything is well incorporated. This should feel like a fun, hands-on experience—almost meditative!
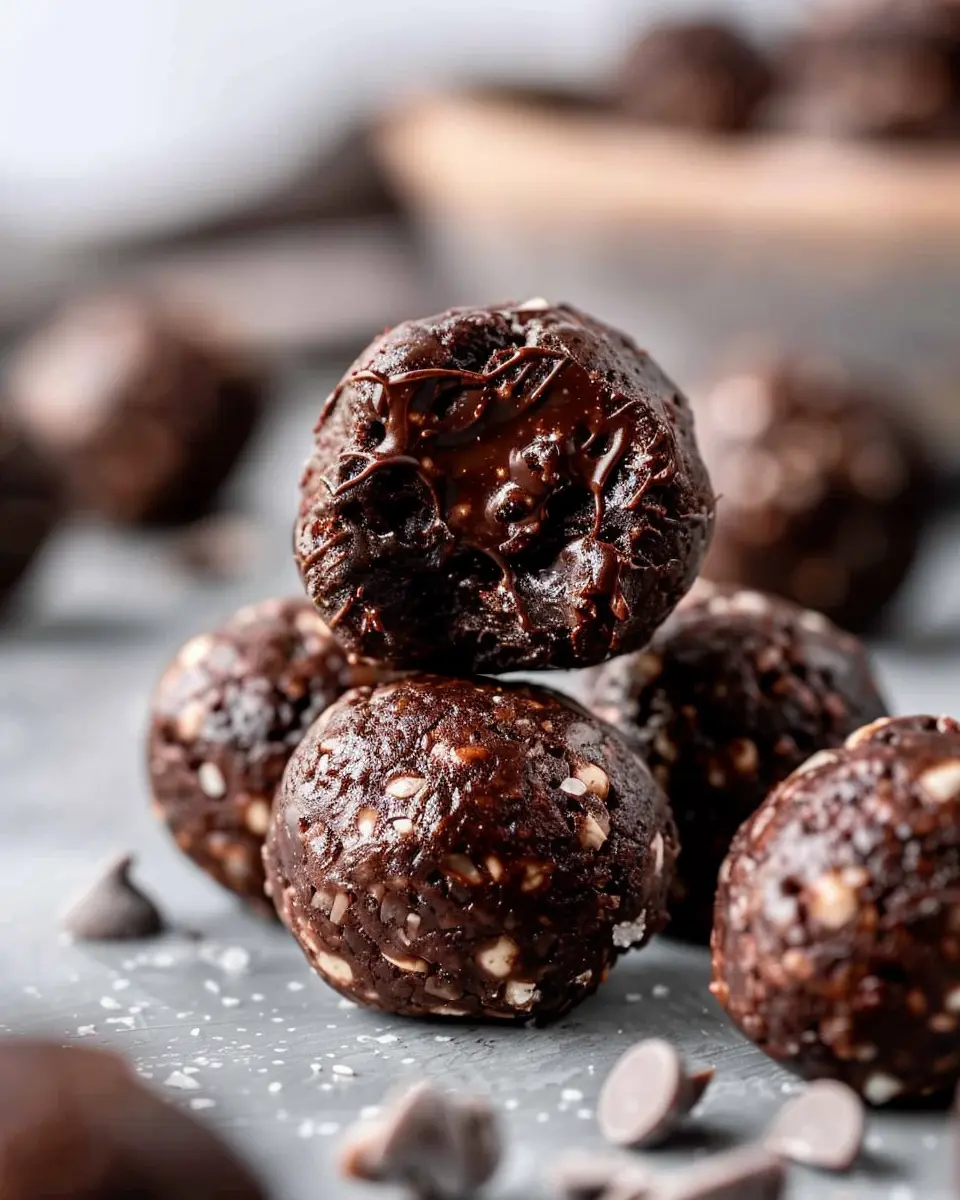
Form the Bliss Balls
Now comes the fun part—shaping your chocolate protein bliss balls! With clean and slightly damp hands, scoop out a tablespoon of the mixture and roll it into a ball. Aim for about a golf ball size; this will give you the perfect bite-size treat.
If you have extra cocoa powder, you can roll the balls in it for an added cocoa experience! Alternatively, crushed nuts fit snugly for a delightful texture contrast.
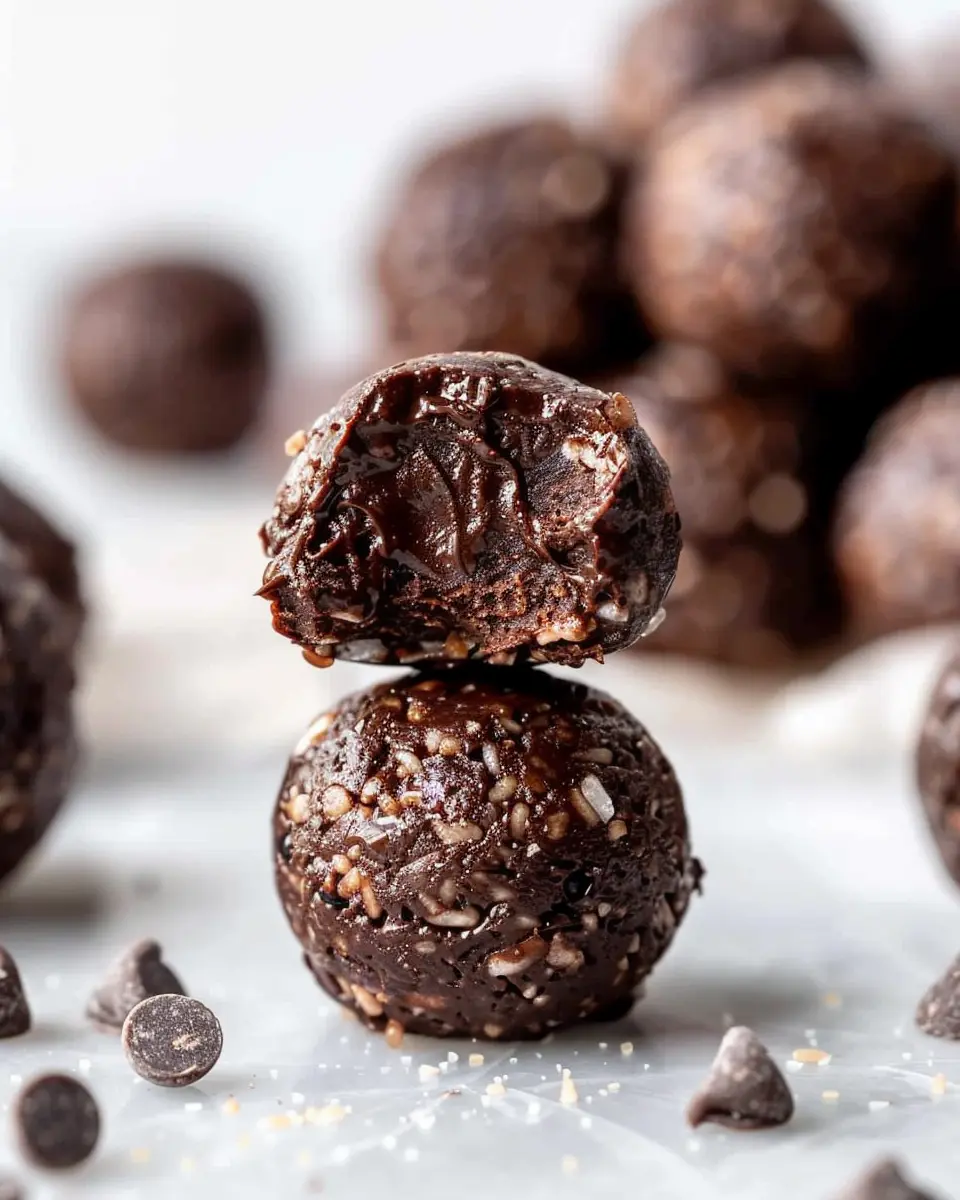
Chill Before Serving
After shaping, place the bliss balls on a lined baking sheet and refrigerate them for about an hour. Chilling not only helps them firm up but also improves the flavors, making each bite even more delightful.
This step is especially crucial for those who like to indulge their sweet tooth a little longer. Trust me; the chilled chocolate protein bliss balls are immensely satisfying after a workout!
Once chilled, they’re ready to indulge! You can store them in an airtight container in the fridge for up to a week—perfect for grabbing on the go.
These chocolate protein bliss balls are not just a snack; they’re a treat full of health benefits. Packed with protein, fiber, and healthy fats, they keep you full and energized throughout the day.
So there you have it! Make these scrumptious bites your go-to energy booster, and don’t hesitate to share your experiences or variations in the comments. Happy snacking!
Variations on Chocolate Protein Bliss Balls
Trying different flavors of chocolate protein bliss balls can keep your snack time exciting! These variations are not only delicious but also easy to whip up. Let’s dive into some enticing options that cater to a variety of tastes and dietary preferences.
Refreshing Mint Chocolate Bliss Balls
If you love the classic combination of mint and chocolate, these bliss balls are for you! Start with your basic chocolate protein bliss ball recipe and add in:
- 1 teaspoon of peppermint extract
- 1/4 cup of crushed dark chocolate or cocoa nibs for that extra crunch
Not only do these little bites pack a flavor punch, but peppermint is also known for its potential benefits, like enhancing focus and digestion. These minty delights are perfect for a pre-workout snack or an afternoon pick-me-up!
Satisfying Peanut Butter Chocolate Bliss Balls
Combine the rich taste of peanut butter with your chocolate protein bliss balls for a creamy twist. Incorporate:
- 1/2 cup of creamy natural peanut butter
- A pinch of sea salt
Peanut butter is an awesome source of protein and healthy fats, making it a fantastic addition to your diet. Plus, who doesn’t love the classic chocolate-peanut butter combo? This variation is sure to satisfy any cravings.
Simple Nut-Free Chocolate Bliss Balls
For those with nut allergies, you can still enjoy chocolate protein bliss balls without the worry! Just swap out the nut-based ingredients for seeds like sunflower or pumpkin seeds. Here’s a quick guide:
- Substitute nut butter with sunflower seed butter
- Use rolled oats instead of nut flour
These bliss balls are just as nutritious and tasty but cater to allergy concerns. Perfect for sharing at parties or school events!
With these variations, you can indulge in chocolate protein bliss balls while tailoring them to your unique palate. Don’t hesitate to get creative with different flavors or textures! If you’re looking for more tips, check out resources like The Nutrition Source for insights on wholesome snack ideas.
Baking notes for Chocolate Protein Bliss Balls
Tips for consistency
Getting the right texture for your chocolate protein bliss balls is key. If your mixture feels too dry and crumbly, try adding a splash of nut milk or a tablespoon of honey for extra moisture. Conversely, if it’s too wet, a bit of rolled oats or protein powder can help absorb excess moisture and achieve that perfect bite-sized consistency.
Remember, not all protein powders behave the same, so don’t hesitate to adjust your ingredients. It can be a fun experiment—after all, who doesn’t love a little kitchen adventure?
Storage recommendations
Once you’ve rolled your chocolate protein bliss balls into delicious bites of goodness, proper storage can keep them fresh. Store them in an airtight container in the refrigerator for up to a week, or freeze them for up to three months. If you’re meal prepping, consider individually wrapping each ball in parchment paper or using a silicone freezer bag to avoid sticking. They make a quick snack, which is perfect for busy days!
For more insights on meal prepping and snack storage, check out this article. Happy baking!

Serving suggestions for Chocolate Protein Bliss Balls
Ideal pairings for bliss balls
When you’re enjoying chocolate protein bliss balls, think about accompanying them with fun, flavorful options! Try pairing them with a creamy almond or peanut butter spread for an extra protein boost. Fresh fruits like banana or berries not only enhance the taste but also add a refreshing twist. If you’re craving something heartier, consider enjoying your bliss balls alongside a smoothie made with spinach, banana, and almond milk. It makes for a fantastic snack!
Creative ways to enjoy them
The versatility of chocolate protein bliss balls is truly remarkable. Here are a few creative ideas to enjoy these delightful bites:
- Breakfast Boost: Crumble them over yogurt or oatmeal for a nutritious start to your day.
- Energy Snack: Keep a few in your gym bag or desk for a quick energy lift during busy workdays.
- Party Treats: Serve them at gatherings as a healthier dessert option; everyone loves a guilt-free treat!
By experimenting with these suggestions, you can easily incorporate chocolate protein bliss balls into your daily routine. And don’t forget to check out more snack ideas and tips from trusted nutrition sources here.
Tips for Making Perfect Chocolate Protein Bliss Balls
Adjusting Sweetness
When it comes to your chocolate protein bliss balls, finding the perfect sweetness is key. You can start with a base of natural sweeteners like honey or maple syrup and adjust to your taste. If you prefer a healthier option, consider using mashed bananas or dates. Did you know that dates are not only sweet but also pack a nutritional punch? They’re high in potassium and fiber! Taste as you go, and feel free to add a pinch of sea salt to enhance those sweet notes.
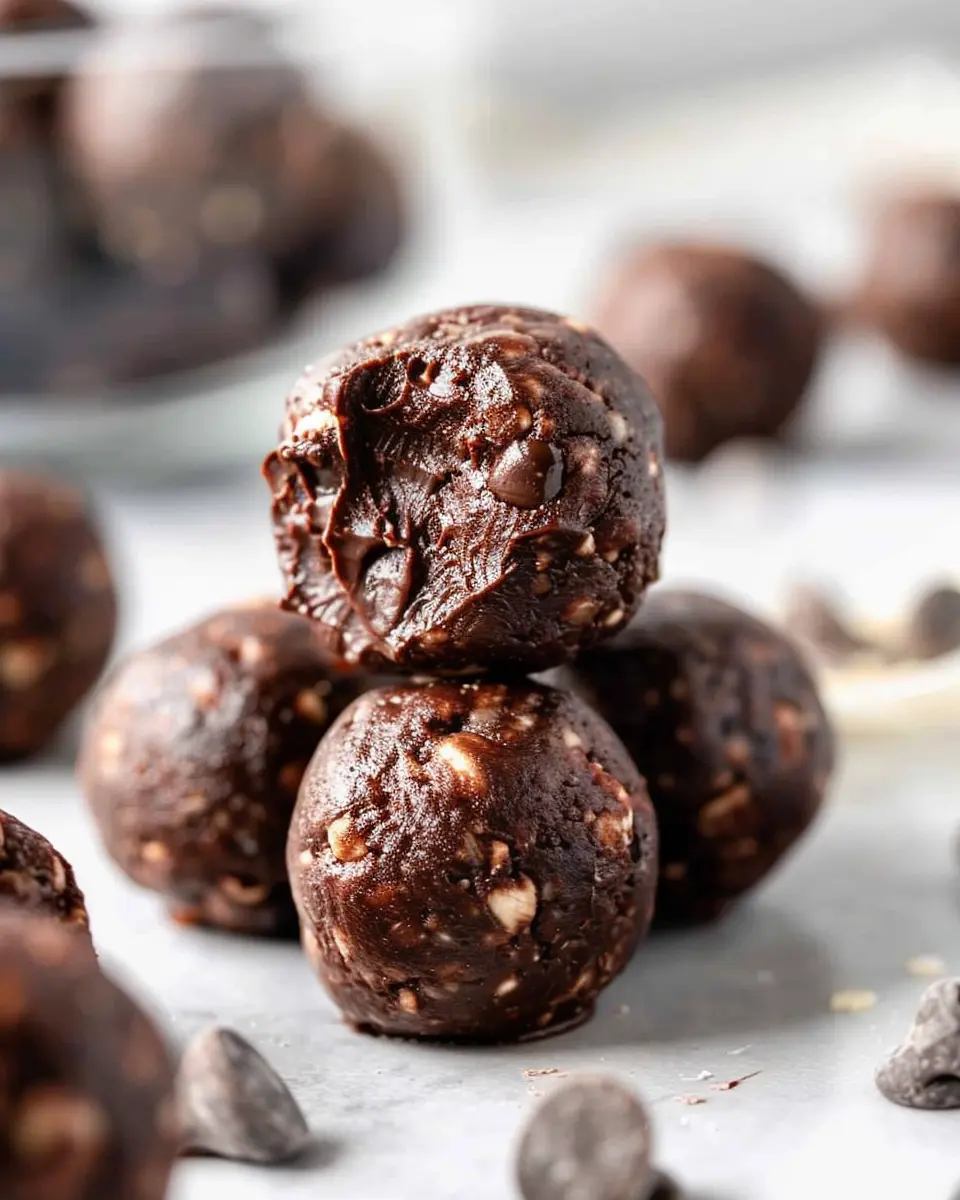
Enhancing Texture
The texture of your chocolate protein bliss balls can make or break the experience. For the perfect bite, consider incorporating a variety of ingredients. Use rolled oats for chewiness and a scoop of nut butter for creaminess. If you’re aiming for crunch, try adding chopped nuts or seeds. A sprinkle of shredded coconut can also provide that delightful texture! Remember, the key here is balance. Too much dry ingredients can leave you with a crumbly mess, while too much moisture can lead to a sticky disaster. Practice makes perfect, so don’t hesitate to experiment until you find your ideal blend.
For more tips on enhancing flavors and textures, check out this article on healthy snacking.
Time details for Chocolate Protein Bliss Balls
When you’re in the mood for a quick yet nutritious snack, these Chocolate Protein Bliss Balls come to the rescue. Here’s how much time you need to whip them up!
Preparation time
Crafting your chocolate protein bliss balls only takes about 15 minutes. Grab your ingredients, roll up your sleeves, and let’s get mixing! You’ll be amazed at how quickly everything combines into a delicious dough.
Chilling time
For the best texture and flavor, chill your bliss balls in the refrigerator for about 30 minutes. This step not only firms them up but also enhances the chocolatey goodness. Trust me, it makes a difference!
Total time
In total, you’re looking at just around 45 minutes from start to finish. With all that time saved, why not check out some health benefits of dark chocolate on Healthline? Get ready to enjoy a guilt-free treat that satisfies your sweet tooth!
Nutritional Information for Chocolate Protein Bliss Balls
Calories
These delightful chocolate protein bliss balls pack an impressive energy punch, with each ball containing approximately 120 calories. This makes them a fantastic snack option, especially when you need a boost between meals.
Protein Content
When it comes to protein, these bliss balls shine. Each serving delivers about 8 grams of protein, making them an excellent choice for those looking to maintain or build muscle. Plus, adding a high-quality protein powder can enhance this further.
Key Nutrients
In addition to protein, chocolate protein bliss balls are loaded with key nutrients:
- Fiber: Aids digestion and keeps you feeling full longer.
- Healthy Fats: From ingredients like nut butter, which provide essential fatty acids.
- Vitamins & Minerals: Ingredients such as cocoa powder contribute antioxidants, which are crucial for overall health.
For more about the nutritional benefits of protein-rich snacks, you can check out resources from the Academy of Nutrition and Dietetics. Making these chocolate protein bliss balls part of your go-to snack routine is not just tasty; it’s a smart choice for your health!
FAQs about Chocolate Protein Bliss Balls
Can I use different types of protein powder?
Absolutely! One of the best things about chocolate protein bliss balls is their versatility. While whey protein is quite popular for its easy blendability, you can also experiment with plant-based options like pea, hemp, or brown rice protein. Just remember that different powders may slightly alter the taste and texture—plant-based proteins might yield a denser ball, while whey can keep them lighter. If you’re unsure which one to pick, you might want to check out comprehensive reviews on protein powders at reputable fitness sites like Healthline.
How long do these bliss balls last?
Your homemade chocolate protein bliss balls are not only delicious but also good for convenience! If stored in an airtight container in the fridge, they can last about a week. However, you can also store them in the freezer for up to three months! This is perfect if you’re trying to meal prep or want a quick snack on-the-go. Just let them thaw a few minutes before enjoying!
Are there any allergy considerations?
When it comes to allergies, it’s always better to err on the side of caution. If you or someone you’re serving has nut allergies, you can substitute nut butter with seed butter. Additionally, check the labels on your protein powder, as some may contain allergens like dairy or gluten. Always consider using certified gluten-free ingredients if you’re catering to gluten sensitivity. If you’re interested in more on this topic, the Food Allergy Research & Education organization offers valuable insights.
Feel free to play with this recipe, and don’t hesitate to share your favorite variations with fellow health enthusiasts!
Conclusion on Chocolate Protein Bliss Balls
In summary, chocolate protein bliss balls are not just a delicious snack; they are a powerhouse of nutrition that’s perfect for your busy lifestyle. Packed with protein and healthy fats, they can help fuel your workouts or provide a satisfying guilt-free treat during your afternoon slump. As you experiment with variations, consider trying different nuts, seeds, or spices for a personal touch. These bliss balls are incredibly versatile, and the possibilities are limitless!
Remember to store them properly to keep them fresh. For more great healthy recipes, check out Nutrition.gov for ideas and inspiration!
PrintChocolate Protein Bliss Balls: Easy, Indulgent Snacks You’ll Love

These chocolate protein bliss balls are a quick, smudge-free snack perfect for any time of the day.
- Prep Time: 15 minutes
- Total Time: 45 minutes
- Yield: 10 balls
- Category: Snacks
- Method: No-bake
- Cuisine: American
- Diet: Vegetarian
Ingredients
- 1 cup pitted dates
- 1/2 cup natural almond butter
- 1/4 cup cocoa powder
- 1/4 cup chocolate protein powder
- 1/4 cup rolled oats
- 1/4 cup shredded coconut
- 1/4 teaspoon salt
Instructions
- In a food processor, combine all ingredients until well blended.
- Form the mixture into small balls.
- Refrigerate for at least 30 minutes before serving.
Notes
- Try using different nut butters for variety.
- Store in an airtight container for up to a week.
Nutrition
- Serving Size: 1 ball
- Calories: 100
- Sugar: 5g
- Sodium: 1mg
- Fat: 4g
- Saturated Fat: 1g
- Unsaturated Fat: 3g
- Trans Fat: 0g
- Carbohydrates: 12g
- Fiber: 2g
- Protein: 3g
- Cholesterol: 0mg