Introduction to Mini Cannoli Cups
A delightful treat for every occasion
If you’ve ever dreamt of indulging in Italian pastry without the fuss, then you’re in for a treat with these delightful Mini Cannoli Cups. These bite-sized wonders combine the classic creamy, sweet filling of traditional cannoli with the convenience of a shell you can hold right in your hand. Perfect for parties, casual gatherings, or even as a sweet indulgence after a long day, these mini treats can suit any occasion.
The beauty of Mini Cannoli Cups lies not just in their flavor but in their versatility. You can personalize the filling by experimenting with different flavors such as chocolate, vanilla, or even pistachio, giving you plenty of room for creativity. Plus, the presentation is adorable! Imagine these little cups gracing your dessert table, each one a perfect little package of goodness that will delight your guests and impress your friends.
Did you know that cannoli originated in Sicily, where bakers developed their unique techniques over centuries? Traditional cannoli are made with crispy shells filled to perfection with sweet ricotta cheese, and while our mini version pays homage to this classic, its simplicity makes it accessible for anyone to make right at home. According to food experts, embracing traditional dishes in a bite-sized format not only elevates the eating experience but also allows for easy portion control—a huge plus in today’s health-conscious world.
Creating your Mini Cannoli Cups can also be a fun activity. Grab a few friends, set up a filling station, and let everyone customize their own cups. Need some inspiration? Check out this recipe from Epicurious for ideas on flavor combinations that could elevate your cups even further.
So, whether you’re looking to impress at your next gathering, or simply want a sweet treat for yourself, Mini Cannoli Cups are your go-to dessert. Stay tuned for the full recipe, and get ready to enjoy a little slice of Italy right at home!
Ingredients for Mini Cannoli Cups
Creating the perfect Mini Cannoli Cups starts with selecting the right ingredients. Here’s a straightforward list to get you started on your delightful dessert adventure.
Essential Components
- Cannoli Shells: You can find pre-made shells at your local grocery store or make them yourself. Homemade versions indeed have that special touch!
- Ricotta Cheese: Aim for whole milk ricotta for a creamy texture. It’s the core of the filling, delivering that classic cannoli taste.
- Powdered Sugar: This sweetens the ricotta and adds a silky finish. Adjust the quantity to fit your preference for sweetness!
- Vanilla Extract: A splash of pure vanilla extract will elevate the flavor profile.
- Mini Chocolate Chips: For some fun texture and extra sweetness, fold these into the filling!
- Chopped Nuts: Pistachios or almonds work wonderfully for crunch and elegance.
Optional Enhancements
- Cinnamon: A dash can add warmth to your filling.
- Lemon Zest: This brightens the flavor and adds a refreshing twist.
These ingredients come together to create delightful Mini Cannoli Cups. Consider experimenting with different fillings or toppings—after all, the best part of cooking is getting to customize the flavors to your liking! For more ideas, check out this engaging guide on recipe variations.
Step-by-step preparation of Mini Cannoli Cups
Creating delightful mini cannoli cups is not just about making a dessert; it’s an experience filled with rich flavors and textural contrasts. This guide will help you navigate the steps in crafting these tantalizing treats without missing a beat. So, roll up your sleeves, and let’s get started!
Gather your ingredients
First things first: let’s pull together all the ingredients you’ll need. A well-prepared kitchen makes for a smoother cooking experience! Here’s what you should have on hand:
-
For the pastry cups:
-
1 package of phyllo dough (preferably thawed)
-
½ cup melted butter
-
¼ cup sugar
-
For the ricotta filling:
-
2 cups ricotta cheese (make sure it’s whole milk for extra creaminess)
-
1 cup powdered sugar
-
1 teaspoon vanilla extract
-
½ teaspoon cinnamon (optional, for a hint of warmth)
-
½ cup mini chocolate chips (or any other toppings you prefer)
Once you’ve gathered everything, you can start preparing your pastry cups!
Prepare the pastry cups
The pastry cups are what make your mini cannoli cups visually appealing and delicious! Follow these steps:
- Preheat your oven to 375°F (190°C).
- Take the thawed phyllo dough and lay it flat on a clean surface. It’s pretty delicate, so handle it gently.
- Brush each layer of phyllo dough with the melted butter. You’ll want to stack about three or four layers to create a sturdy cup.
- Once layered, cut the dough into about 3-inch squares.
- Gently press each square into muffin tins, molding them into cup shapes.
- Sprinkle a bit of sugar over the top of each unbaked cup for that sweet caramelization.
- Bake for about 12-15 minutes, or until they are golden brown. Let them cool in the tin for a few minutes before transferring them to a wire rack.
For more tips on working with phyllo dough, you might find this guide from The Spruce Eats helpful!
Create the creamy ricotta filling
Now, onto the star of the show—the creamy filling that makes these mini cannoli cups a true gourmet treat!
- In a large mixing bowl, add the ricotta cheese. Make sure it’s fully drained for a thick texture.
- Gradually mix in the powdered sugar, followed by the vanilla extract and cinnamon if you chose to use it. This will give your filling flavor depth.
- Stir in the mini chocolate chips, making every bite a little surprise of sweetness.
This mixture should be velvety and smooth, perfect for filling your cups!
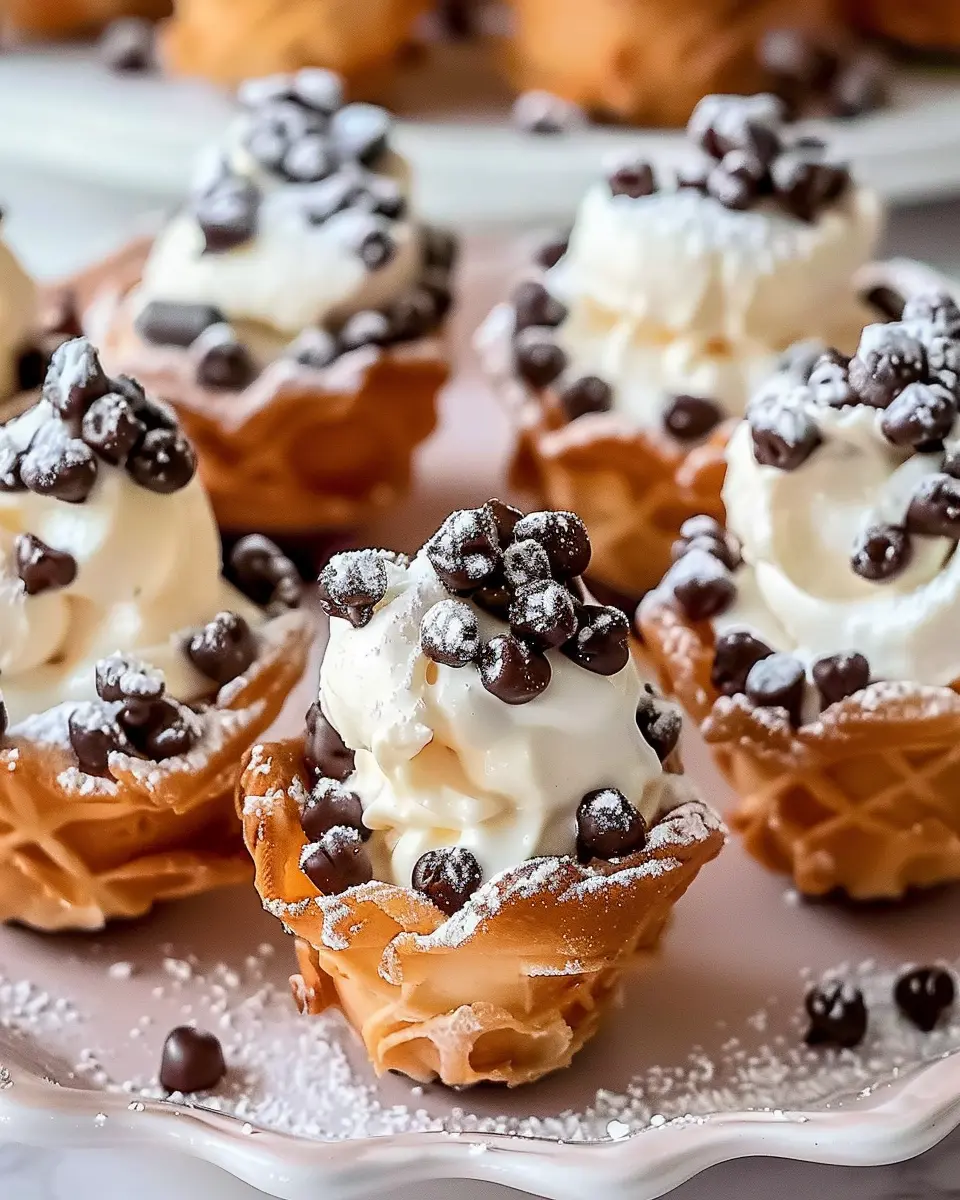
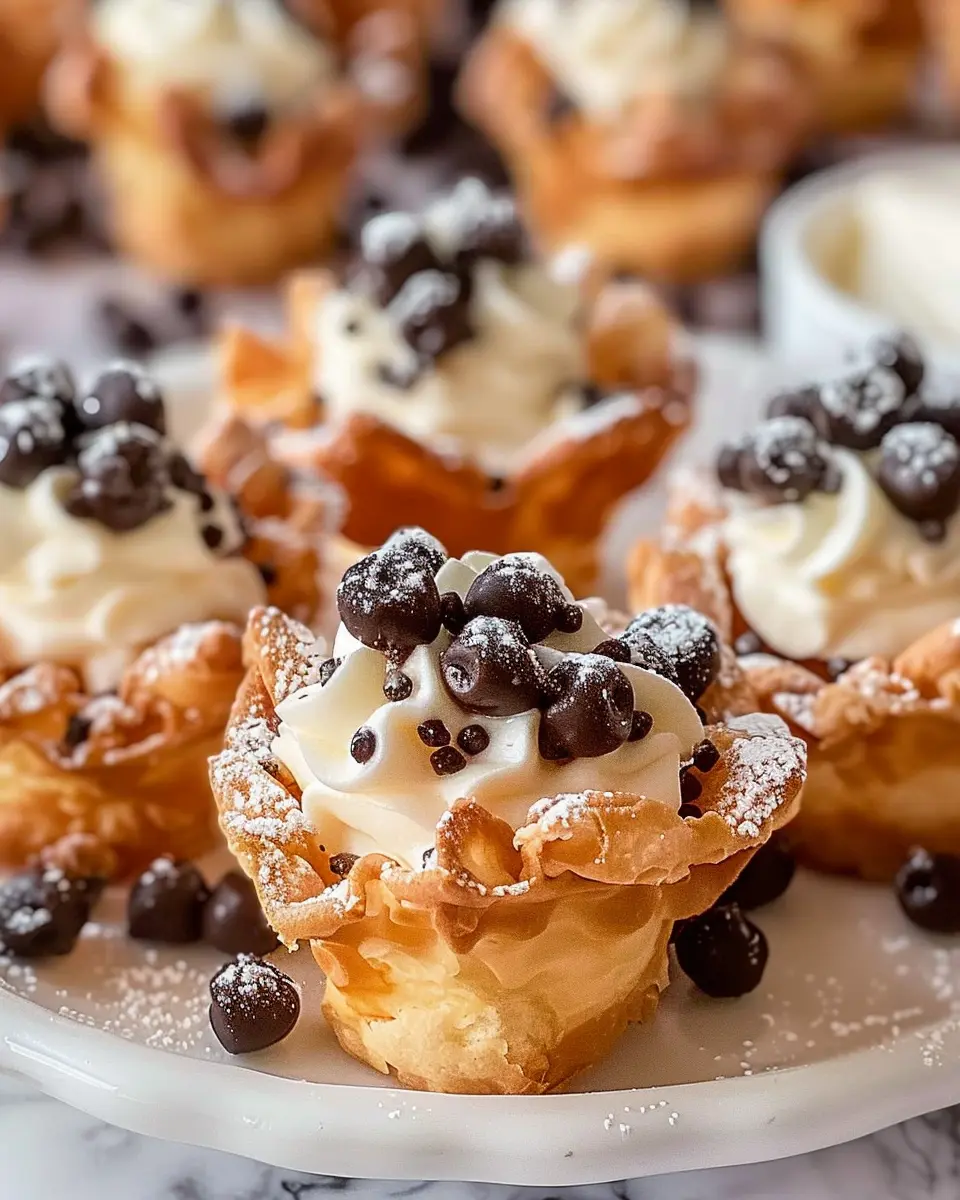
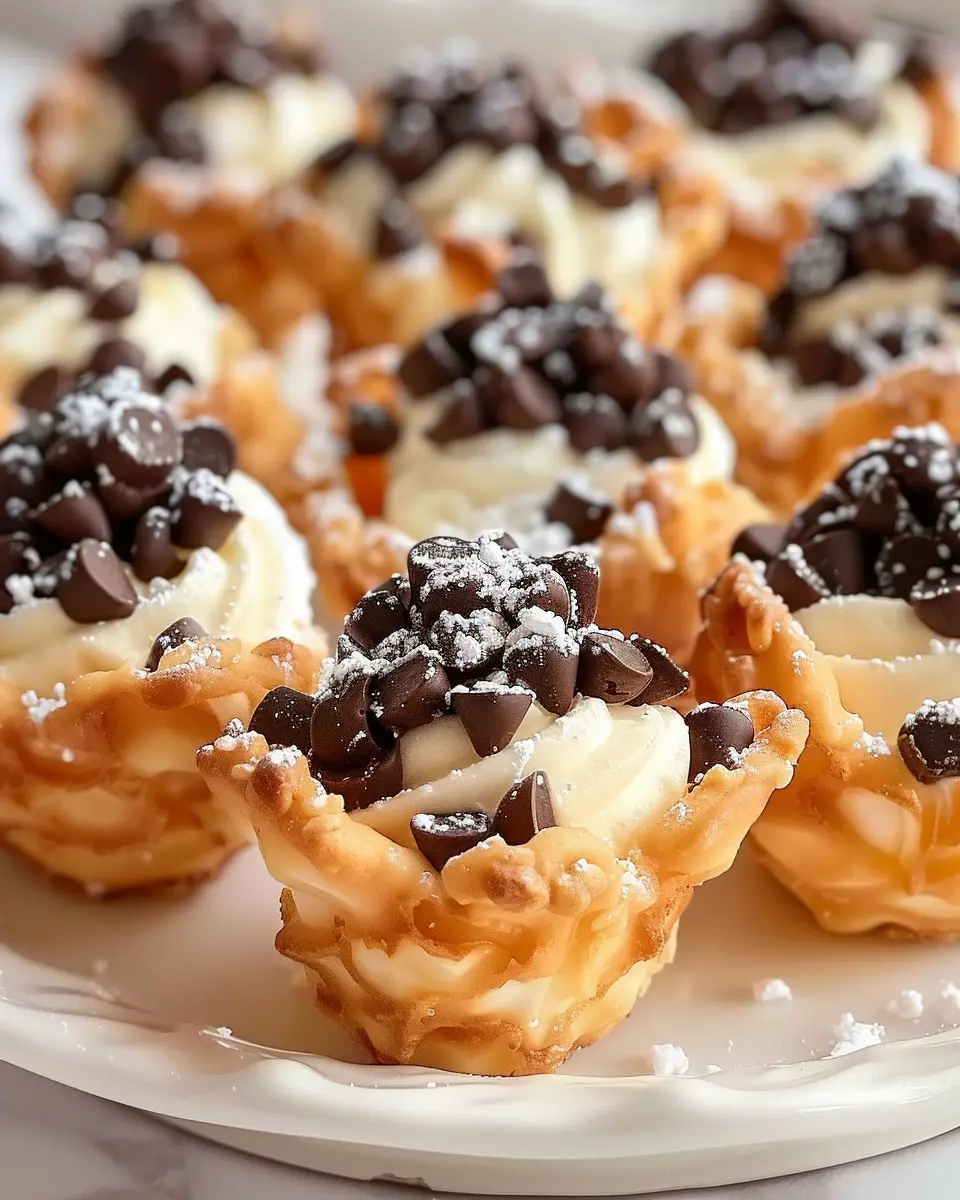
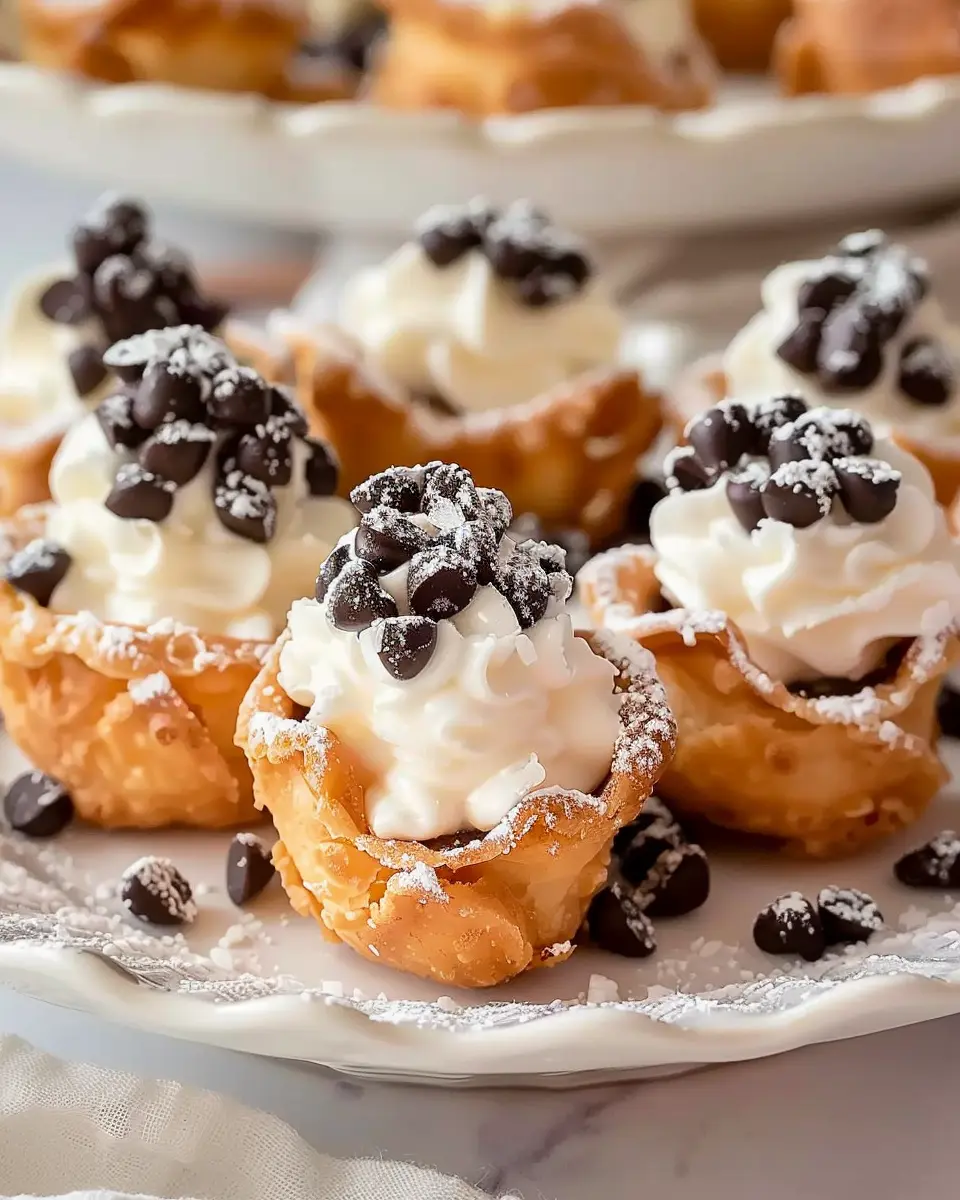
Assemble the cannoli cups
Time to bring your mini cannoli cups to life:
- Once the pastry cups are completely cool, fill them with the ricotta mixture. You can use a piping bag for a more polished look, or simply spoon it in.
- If you’re feeling fancy, sprinkle some more chocolate chips or even crushed nuts on top for added texture.
Feel free to experiment with the toppings! Some people enjoy a sprinkle of chopped pistachios or candied orange peel for that extra kick.
Chill and serve
Your mini cannoli cups are almost ready, but we need to let them chill for the best flavor:
- Place the filled cups in the refrigerator for at least one hour. This allows the flavors to meld and the filling to set.
- Serve your delicious treats chilled, perhaps alongside a cup of coffee or tea for a delightful pairing.
These cannoli cups can take center stage at a dinner party or be a sweet escape after a long workday. Enjoy every delicious bite!
For more fun dessert ideas, check out this post on Dessert Tips. Happy baking!
Variations on Mini Cannoli Cups
When it comes to mini cannoli cups, the classic recipe is undeniably delicious, but why not shake things up a bit? Here are some delightful variations that not only bring fun flavors to the table but also add a unique twist for your gatherings.
Classic Mini Cannoli with Chocolate Chips
Let’s start with the tried-and-true favorite! The classic mini cannoli cups feature a rich ricotta filling, enhanced with a sprinkle of mini chocolate chips. Not only do they add a touch of sweetness, but they also create that lovely texture contrast. Mix in the chocolate chips into the filling before spooning it into your crispy shells. You’ll have a bite-sized treat that feels indulgent yet approachable. If you’re curious about more ways to incorporate chocolate into desserts, check out this chocolate enthusiasts guide.
Pistachio-Topped Mini Cannoli
Looking for something a tad more extravagant? Try pistachio-topped mini cannoli cups! Add finely chopped pistachios to your filling for a nutty depth of flavor, then sprinkle more on top for a delightful crunch. The gorgeous green color also adds a visual appeal that’s hard to resist. It’s a lovely option that offers an elegant twist while still retaining that classic charm.
Seasonal Fruit Mini Cannoli
For a refreshing take, consider seasonal fruit mini cannoli cups. Think strawberries in the summer or pumpkin for fall. Mix pureed fruits into your filling or simply layer them on top for a pop of color and flavor. These fruity variations not only make for a lighter dessert but can also impress your guests with their artistic presentation!
Feel free to experiment and combine these ideas to create your signature mini cannoli cups. Let your creativity guide you, and you might just discover a new favorite flavor!
Cooking Tips and Notes for Mini Cannoli Cups
Creating delectable Mini Cannoli Cups is easier than you might think! Here are a few tips to help you achieve that perfect, creamy filling and satisfy your sweet cravings.
Ingredients Matter
Select quality ingredients, such as ricotta cheese and mascarpone, for a rich flavor. Use fresh vanilla extract instead of imitation for an authentic taste. Don’t hesitate to experiment with different sweeteners like honey or agave syrup for a unique twist.
Shell Perfection
For crispy shells, consider baking them until golden brown. Check out this guide on making crisp pastry shells, ensuring a delightful crunch with each bite. Cooling them completely before filling is crucial; otherwise, the filling might get soggy.
Filling Techniques
When piping your filling, use a larger tip for effortless stuffing. This ensures an even distribution of the delightful mixture, making each bite irresistible. If you’re feeling adventurous, throw in some chocolate chips or finely chopped pistachios for an added crunch!
Serving Suggestions
Serve your Mini Cannoli Cups chilled for the best flavors to shine through. Consider garnishing with additional chocolate shavings or a dusting of powdered sugar for that visual appeal.
By following these tips, you’ll impress your friends and family at your next gathering!
Serving Suggestions for Mini Cannoli Cups
Perfect Pairings with Coffee
If you’re hosting a brunch or just enjoying a quiet evening, Mini Cannoli Cups make a delightful accompaniment to your favorite coffee. Their creamy filling complements coffee’s rich flavors perfectly. Consider serving them with:
- Espresso: A shot of strong espresso enhances the sweetness of the cannoli without overshadowing it.
- Cappuccino: The frothy milk in cappuccino pairs beautifully with the crunchy shell and creamy filling.
- Cold Brew: Opt for a chilled option during warm days to create a refreshing balance.
These combinations not only heighten the flavor experience but also create an inviting atmosphere for your guests. For great coffee brewing tips, check out resources from the Specialty Coffee Association.
Great for Gatherings and Parties
Thinking about hosting a get-together? Mini Cannoli Cups are a hit for any occasion! Their bite-sized nature makes them easy to serve and enjoy. Here are some ideas:
- Dessert Table: Arrange them with other desserts for a beautiful display.
- Finger Desserts: Perfectly portable, they can be enjoyed without utensils, making mingling stress-free!
- Themed Events: Try using fun toppings that match your event’s theme — colorful sprinkles for birthdays or seasonal fruits for holidays.
These delightful treats not only satisfy sweet cravings but also add a charming touch to any spread. Check out the American Culinary Federation for more ideas on dessert presentations!
Time breakdown for Mini Cannoli Cups
Creating Mini Cannoli Cups is a delightful endeavor that won’t take too much of your time. Here’s a quick breakdown to help you plan your baking session.
Preparation time
Getting everything ready will only take about 20 minutes. This includes gathering ingredients, preparing your cannoli filling, and assembling your mini cups.
Cooking time
Baking the shells will require roughly 12-15 minutes. The goal is to achieve a golden-brown hue—just enough to give them that satisfying crunch.
Total time
In total, you’re looking at around 35-40 minutes from start to finish. This speedy process means you can whip up these tasty treats even on a busy weeknight. If you’re looking for more baking inspiration, check out sites like Food Network or Bon Appétit for additional sweet ideas. Happy baking!
Nutritional Facts for Mini Cannoli Cups
Serving Size and Calories
When savoring your delightful Mini Cannoli Cups, remember that moderation is key. Each cup typically contains around 100 calories, making it a sweet treat that won’t derail your healthy eating habits. To best enjoy these scrumptious bites, consider indulging in one or two at a time, and pair them with a balanced meal.
Sugars and Fats
These Mini Cannoli Cups bring a delightful combination of flavors, but be mindful of the sugar and fat content. With approximately 8 grams of sugar and 5 grams of fat per serving, they’re sweet yet satisfying. If you’re looking to lighten things up, consider using lower-fat ricotta cheese or a sugar substitute, as suggested by nutrition experts at Healthline and Mayo Clinic.
Feeling inspired to whip these up? Remember, it’s all about balance—enjoy these treats as part of a varied diet!
FAQs about Mini Cannoli Cups
Can I make the shells ahead of time?
Absolutely, you can prepare the shells for your Mini Cannoli Cups ahead of time! In fact, making the shells a day in advance can save you time and help them maintain their crispness. Just ensure you store them in an airtight container at room temperature to keep them fresh. Avoid refrigeration, as moisture can impact their texture. When you’re ready to fill them, simply whip up your filling and pair them with the crunchy shells for a delightful dessert.
How do I store leftovers?
Leftovers? You might not have many since these Mini Cannoli Cups are often gobbled up quickly! But if you do have some leftovers, store the shells and the filling separately to maintain their textures. The shells should stay in an airtight container at room temperature, while the filling can be refrigerated for up to three days. When you want a sweet treat later, fill the shells just before serving to keep everything fresh and crunchy.
What can I use instead of ricotta cheese?
If you’re looking to switch things up or simply don’t have ricotta cheese on hand, no worries! Options like mascarpone cheese, cream cheese, or even a vegan cream cheese can work beautifully in your filling. Just remember, each choice may slightly alter the flavor and texture, so don’t be afraid to get creative! You can read more about cheese substitutes on culinary websites such as Food Network or Serious Eats for additional ideas.
With these tips, making and enjoying your Mini Cannoli Cups will be both fun and manageable! Let your creativity shine through, and happy baking!
Conclusion on Mini Cannoli Cups
In wrapping up our delightful journey with Mini Cannoli Cups, it’s clear they’re a versatile treat perfect for any occasion. Easy to whip up, these delicious bites offer layers of flavor with creamy filling and crunchy shells. Whether you’re serving them at a party, a family gathering, or just indulging at home, these mini delights are sure to impress.
Feel free to get creative; mix in your favorite toppings or use different flavored fillings to personalize them. For more inspiration, check out resources like Serious Eats or Bon Appétit. You’ll find endless variations that will keep your dessert game strong!
PrintMini Cannoli Cups: Easy, Indulgent Treats for Any Occasion

These Mini Cannoli Cups are a deliciously easy dessert that everyone will love. Perfect for parties or a sweet treat anytime.
- Prep Time: 20 minutes
- Cook Time: 0 minutes
- Total Time: 20 minutes
- Yield: 12 servings
- Category: Dessert
- Method: No-bake
- Cuisine: Italian
- Diet: Vegetarian
Ingredients
- 1 cup mascarpone cheese
- 1/2 cup ricotta cheese
- 1/2 cup powdered sugar
- 1 teaspoon vanilla extract
- 1/2 cup mini chocolate chips
- 12 mini phyllo cups
- 2 tablespoons chopped pistachios
Instructions
- In a mixing bowl, combine mascarpone cheese, ricotta cheese, powdered sugar, and vanilla extract. Blend until smooth.
- Fold in the mini chocolate chips.
- Using a piping bag, fill each mini phyllo cup with the cheese mixture.
- Top with chopped pistachios.
- Serve immediately or refrigerate until ready to serve.
Notes
- Feel free to add other toppings like fruit or additional chocolate chips for variation.
Nutrition
- Serving Size: 1 cup
- Calories: 150
- Sugar: 10g
- Sodium: 80mg
- Fat: 9g
- Saturated Fat: 5g
- Unsaturated Fat: 3g
- Trans Fat: 0g
- Carbohydrates: 15g
- Fiber: 1g
- Protein: 3g
- Cholesterol: 30mg